BlueCat DNS Edge for Google Cloud
Google Cloud Platform (GCP) on DNS Edge allows you to create sites and deploy service point images in your Google Cloud environment. Use GCP to expand or augment your current on-site network environment

Deploying to Google Cloud Platform
This section provides detailed instructions for deploying a DNS Edge service point to Google Cloud Platform.

Enabling SSH for service points deployed to Google Cloud Platform
You must set project-wide SSH keys before deploying the service point to Google Cloud Platform. You must perform these steps to complete the service point deployment process. For more information, click here.
Deploying the service point to Google Cloud Platform
- Navigate to the Google Cloud Platform Marketplace.
- Click Explore Marketplace.
- Enter BlueCat in the Search for solutions search bar.
- Click Launch on Compute Engine to launch BlueCat DNS Edge Proxy Service for Google Cloud. The deployment page opens.
- Download the service point configuration file for Google Cloud Platform.
- Specify a Name for your instance. See Resource naming convention.
- Optional: Change the Zone for this instance. Compute Engine randomizes the list of zones within each region to encourage use across multiple zones.
- Select a Machine configuration for your instance.
- Click Create to create and start the instance.
Attaching the DNS Edge configuration file to the virtual machine
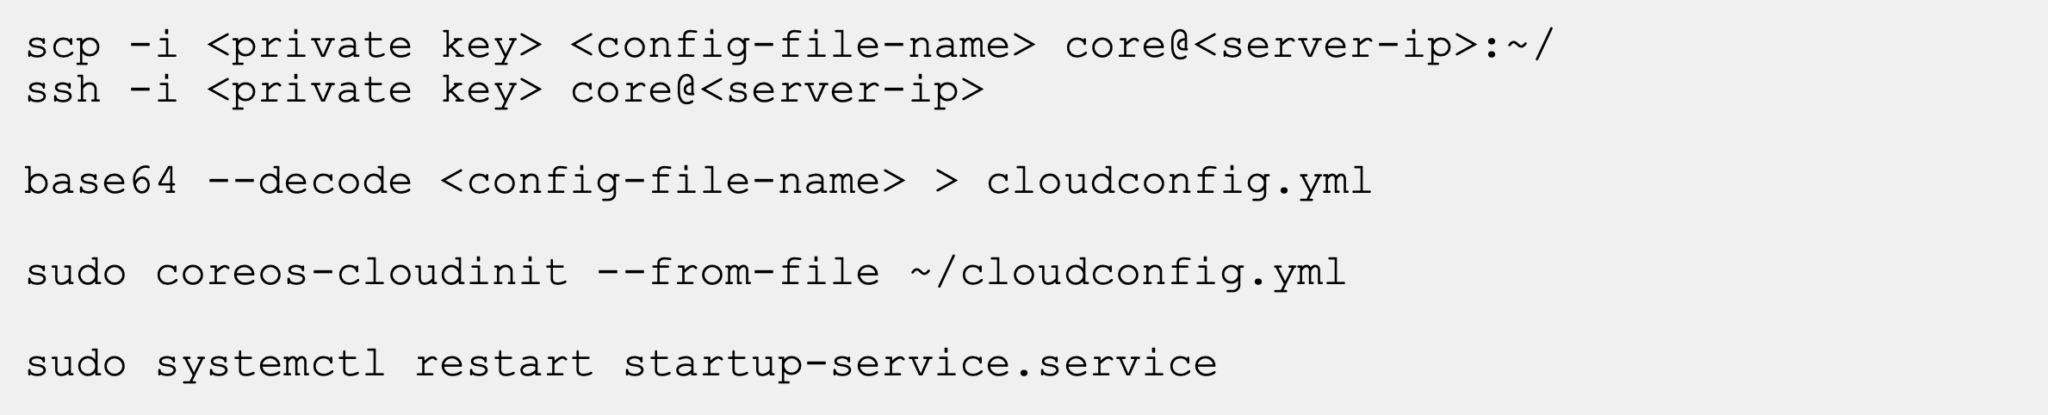
In the commands that follow:
- {config-file-name} is the name of the service point configuration file that you downloaded from DNS Edge.
- {server-ip} is the IP of the service point you want to configure.
- {core@server-ip} is the core user account in the service point.
- {private key} is the name and location of the private key file.
Type the following commands:
Note: It may take a few minutes for the service point to begin to resolve queries.